HOME | FORUM

Installation of a Kawasaki Light bar (PN-K32001-003) on a 2003 800 Drifter

- Courtesy of ThePWTman

Downloadable PDF

Final Update, and hopefully last chapter in this novel,

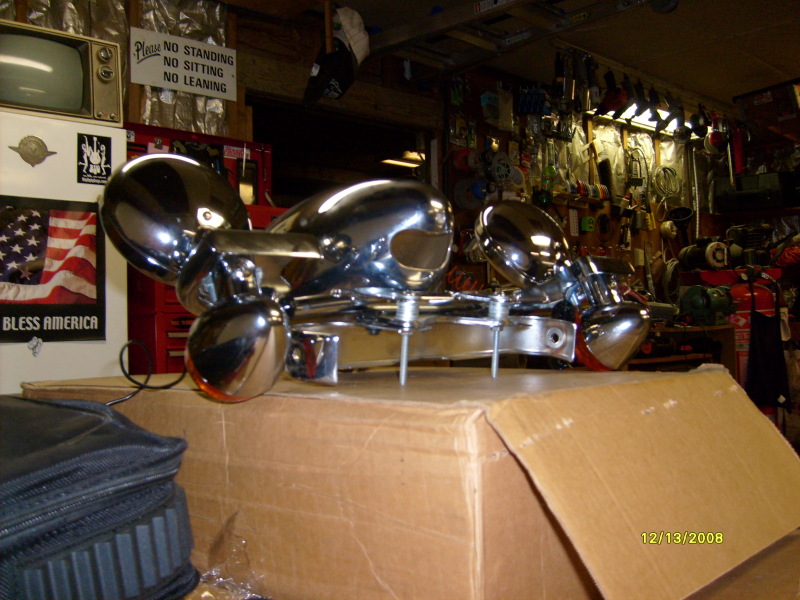
I have finally completed the light bar installation. It took a bit of work, but I am very happy with the results. A link to those interested in pictures follows the write-up. A camera may add 10 pounds to a person. I also think it adds more than 10 pounds of dirt to chrome. My bike wasn't spotless for the pictures, but it was no where near as dirty as it looks. (I digress. Perhaps that is why my posts are getting so long winded.) Anyways per previous posts, when the light bar was mounted under the head light bucket bracket, the light bar conflicted with the lower tree cover and the signals interfered with my freeway bars . I ended up mounting it above the headlight bucket bracket utilizing the following steps:

Installation of a Kawasaki Light bar (PN-K32001-003) on a 2003 800 Drifter

  1. Removed the headlight
  2. Disconnected and removed the signal bar assembly
  3. Removed the headlight bucket and lower tree cover (removing the lower tree cover will not be necessary for someone following these steps)
  4. Removed the studs on the headlight bucket bracket by cutting the welds loose and pounding out the studs from the reverse side.
  5. Ground the remaining welds of the bracket for a smooth surface. ( I then sealed the exposed steel with clear fingernail polish. I could have laquered or painted, but this area will be covered later.
  6. Shortened the side signal bar bolts about 1/4" and reinstalled
  7. Fabricated 2 5/8" tall spacers from 1" chrome tubing. Washers were used for mockup and other material could be utilized for the spacers.
  8. Fabricated rubber inserts for the tubing and drilled a hole for the mounting bolts. (These were cut from hockey puck material I had left over from modifying my bike lift. Like I said I am frugal!)
  9. The spacers are utilized above the headlight bucket bracket and below the light bar mounting taps.
  10. I then installed the new assemblies with 2 - 2" long 5/16" stainless steel carriage bolts, washers and nuts.
  11. I wired the source to the auxilary input wire in the headlight bucket. (White wire blue stripe) Also note, the color code on the signals are reversed.
  12. The ground is the same but the dim and bright filament feeds are reversed.

Pictures of install may be seen here:

Light bar mounted under headlight bracket with no cover an no freeway bar clearance
Lower tree without cover
Headlight bucket and chrome lower tree cover
Light bar will not work under headlight bracket
Light bar mounted under headlight bracket with no cover an no freeway bar clearance Lower tree without cover Headlight bucket and chrome lower tree cover Light bar will not work under headlight bracket
Light bar will fit above headlight bracket
Headlight bracket stud weld cuts
Light bar will not work under headlight bracket Headlight bracket stud weld cuts Headlight stud before removal Weld needs to be ground off
Light bar will fit above headlight bracket
Headlight bracket stud weld cuts
Welds are ground smooth Light bar holes elongated toward front of bike Mocked up with bolts and washers from back Mocked up with bolts and washers from front
Light bar will fit above headlight bracket
Headlight bracket stud weld cuts
Side signal bar bolts too long Lower tree cover back in place with shortened side bolts Mockup on bike - plenty of clearance now Mockup on bike - from top
Light bar will fit above headlight bracket
Headlight bracket stud weld cuts
Garage door opener button - close Garage door opener button - far Light bar signal lights working Final lightbar assembly from right side
Light bar will fit above headlight bracket
Headlight bracket stud weld cuts
Light bar from side Back side of light bar near Back side of light bar far New light bar lit up
Light bar will fit above headlight bracket
     
New light bar from drivers POV      


Thepwtman


Email to Webmaster
Your comments are always welcome.


Web site design by Saftek.


Copyright © , Saftek Inc.


Duplication of any element of this
site without the express permission
of Saftek, Inc. is a violation of
law and is prohibited.


Not affiliated with Kawasaki. Kawasaki, Vulcan and Drifter are trademarks of Kawasaki.