Home Made Knob Solution
Gadget (big thanks to RocDoc and
Robert Mayes)
Plus another easy solution from Virg Blanchard
DOWNLOAD PDF
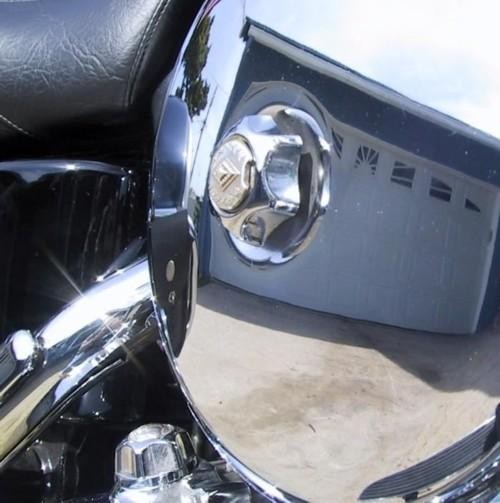
You don't have to use a screwdriver or old washer to open your oil fill cap. Why buy aftermarket air filter nuts ($$$) when you
can make your own?
And the answer is______ Bathroom Faucet Knobs !!!
What you'll need:
- 1- set bathroom faucet knobs (metal not plastic)
- 1- 10-32 bolt (or equivalent) and nut
- JB Weld or paste type epoxy equivalent
How to:
- Measure the outer diameter of your oil filler cap. You can transfer this measurement
(just trace the cap) onto a piece of paper then cut out the hole in the paper or simply wrap a strip of paper around
the cap.
- Wrap the faucet handle you've chosen with tape and transfer your measurement to the knob using the strip of paper or slipping the hole in the paper over the knob.
- Cut the knob with a Dremel or other cutting wheel tool (the tape will keep the chrome
from chipping) Came out a little crooked eh? not to worry. If you have a drill press or a friendly neighbor
with one, pass a bolt (1/4") through the newly trimmed knob with the threads pointed upward. Cinch it down
with a nut and put the bolt into the drill press. Now you can simply run the spinning knob down (carefully) onto
a file and even things out. Don't let the knob get too hot or the chrome will peel off. If you don't have a drill
press handy you can use sandpaper on a flat surface.
- Now you need to drill a hole in the motorcycles oil filler cap. "Be sure it's centered!!!!" Drill the hole just large enough
for a 10-32 bolt (or metric equivalent).
- Clean everything up and do a test fit. Slip your bolt through the top of the cut down
handle, through the hole you've drilled in the oil filler cap and put a nut on it finger tight. Good? If not and
the handle is too large or crooked you can just cut it again. If you've really messed it up there's always the
other handle to work with.
- If the test fit looks good to you we just have to glue it all together. Use the Epoxy
"Paste" (not super glue or contact cement or anything else). The Paste is the stuff made when you mix
the two tubes together. Put the paste on the two items you're gluing together (handle and cover), Put the bolt
through, put some Lock Tite on the bolt end that's peeking through the bottom of the cap (a little extra security),
and tighten it down securely. If there's any extra bolt just cut it off flush with the nut. Now stake the nut by
using a center punch on the bolt. You don't want that sucker coming off and landing in your crankcase. The combination
of LockTite and staking the nut (messing up the first thread) will prevent this. Make sure you don't have any glue
oozing out around the edges. Set the unit aside for the glue to cure.
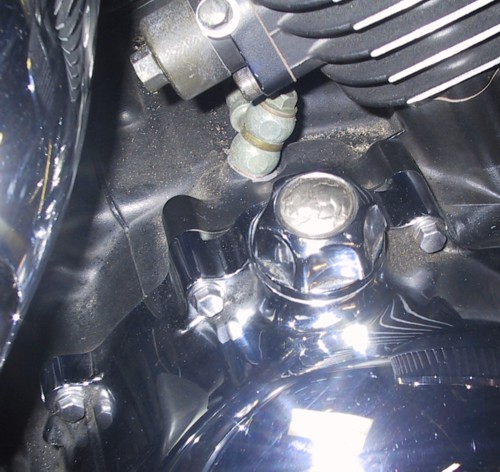
For decoration you can use the faucet handle "H" and "C" that came
with them, find some chrome caps with no printing or file a little off the edge of a nickle and put it in there.
I used an Indian nickle that I domed just a bit and it fit perfectly into the opening.
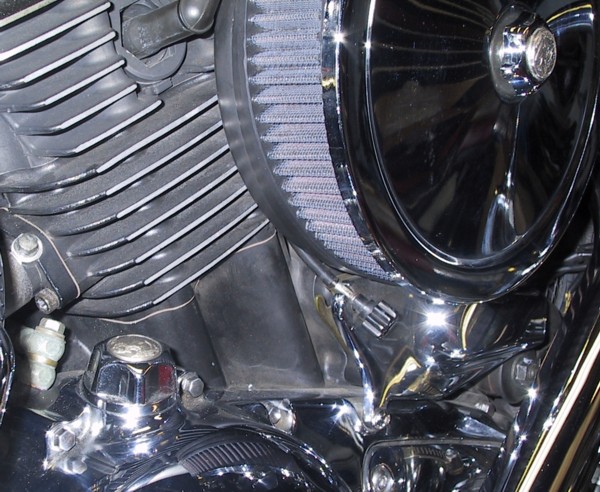
To do the air cleaner cover bolts it's almost exactly the same concept except you cut the lavatory cap much shorter,
grind off about half the center stud inside the handle, put a suitable metric bolt through the center (remember
to use the epoxy) and screw em on! They look good and only cost you about five bucks for two knobs.
Another easy solution from
Virg Blanchard
Find a very hard washer an aircraft washer is the best! 1/8" thick 1X1/4" OD. with a 7/16" hole
ID. (military surplus stores may have these in your area, they're generally a sort of gold color) Drill a hole
in the edge around an 1/8' or a little larger that is for your Key ring. You may have to drill the Hole with a
Cobalt drill turning very fast to cut it! Now, to make it look great, grind the sides to a slite angle. Don't grind
the part that goes into the slot of the Oil Cap! If the cap is on real tight you can use a small endwrench or screwdriver
in the 7/16" hole to get some leverage,

click thumbnail for larger image