GUEST? Registration opens up many more resources which are not available to guests. Registration is free, we never sell or give others access to your information.


Posted by CDNRatMan
- July 26, 2014, 08:56:08 AMLots of work but the results speak volumes, really outside the box.
Posted by greenbarn
- July 26, 2014, 07:35:04 AMNice work, Tecumseh!
I'd like to see more pics of that tail light too!
Posted by mittico68
- July 26, 2014, 05:51:09 AMMan! That is a huge & cool result! 
Now your ride looks IMHO really indian oriented.
I really love it. 
Posted by pcarrell
- July 26, 2014, 04:18:09 AMNow that is trick! Nice work!
Posted by Tecumseh
- July 26, 2014, 02:35:56 AMHere is the only angle pic I have at the moment of the taillight. I didn't document the conversion, but here it is anyways. I cleaned up the rear end by relocating the stock "air brake" position of the license plate over the taillight and mounted it underneath the light nice and flush to the fender. the plate is held in place with a pair of chrome LED light bolts to keep it visible at night. The stock oval palstic taillight assembly was replaced with a nicer looking round chrome steel plated and glass unit from a '50 Pontiac.......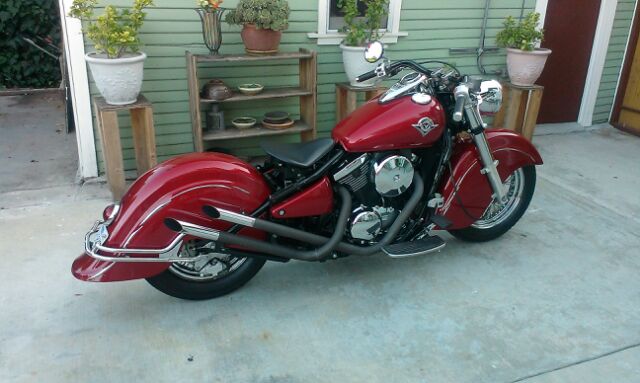

I had been wanting to replace the stock huge chrome headlight for the longest time with a really cool vintage light and I finally came across this 1950's "Marchal 660 Fantastic" driving light at the motorcycle swap meet. The unique reflective pattern and nipple on the lens just wreaked coolness! The lamp body was extremely shallow and also had a 6 volt bulb, so some modification was in order to fit a modern 12 volt / 55 watt bulb and room for the harness.

After both pieces were welded together, with the bezel removed I chucked up the body on the Lathe and spun it to evenly grind the weld nice and round. The welding inclusions that are visible were later filled with JB Weld then sanded smooth.

Rather than start with a whole new mount I had mocked up the light body right where I wanted it positioned on the bike then measured where I was going to have to make one of the cuts on the stock mount to make this work out.


This spacer/washer is what properly seats the light body when mounted.

The lower triple clamp cover was marked out for the light body clearance cut. This was necessary in order for me to mount the light tucked in nice and close as possible.

The mount has now been cut, reconfigured, tack welded and mocked up in place to check alignment of light body-to-mount and triple clamp cover cut......

Light body mounted to triple clamp mount, and all aligns up nicely!

With the light now properly mounted and aligned, holes were layed out for the harness loom and drilled open on the drill press.

Here ALL pieces were fastened together then mocked up just for a looksie, and then..........

.......the moment of truth........"IT'S ALIVE"!

With all fabricating, welding and mounting out of the way now comes the final detailing. I tinted the lens for that classic old look plus it also highlights the reflective pattern of the lens better. I've been slowly chipping away at minimizing the amount of chrome on the bike so I sanded the chrome on the bezel in a linear grain direction just to tone it down a bit then painted the body Oil Rubbed Bronze.

While I was at it I hooked up a toggle switch to the light, this way I can turn it on and off as I please, probably a little easier on the starting also.

A "before" pic with the stock 7" light still mounted. A little too bulky for my taste!.........and then......

...an "after" pic with the 5-3/4" Marchal headlight installed. As you can see, I'm taking my Drifter in more of a lightweight and sporty direction....
